
 Français
Guidelines
Guide to Install Operation System on Orange Pi 5B
27
Feb
Feb
Here’s how to install the operating system to the eMMC on your Orange Pi 5B:
Installing Linux to eMMC
-
Prepare a TF Card
- First, burn the Linux image (Debian/Ubuntu) onto a TF card.
- Use the TF card to boot the development board into the Linux system.
-
Transfer the Image to eMMC
- Upload the decompressed Linux image file to the TF card.
- Use the following command to confirm the eMMC device node:
Example output:
/dev/mmcblk1
-
Burn the Image to eMMC
- Clear the eMMC:
- Burn the Linux image to eMMC:
- After the process is complete, remove the TF card and restart the system.
📖 Detailed steps in the manual, page 59-61
Installing Orange Pi OS (Droid) to eMMC via Type-C
-
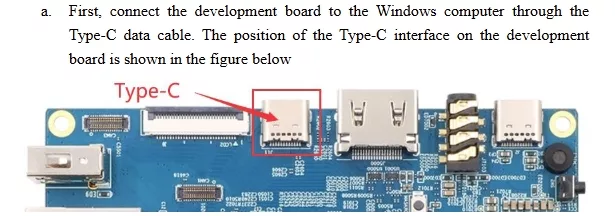
Connect the Board to a Windows PC
- Use a Type-C data cable to connect the development board to your PC.
- Ensure no TF card or USB device is inserted.

-
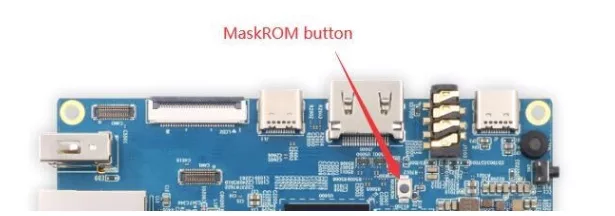
Enter MaskROM Mode
- Hold down the MaskROM button while powering on the board.
-
Burn the OS Image
- Install Rockchip Driver and RKDevTool.
- Load the Orange Pi OS (Droid) image into RKDevTool.
- Click Upgrade to start burning.
📖 More details on page 72-74
Let me know if you need further guidance! 🚀
Forum: https://forum.orangepi.vn
Email: hello@orangepi.vn
Contact: https://orangepi.net/contact
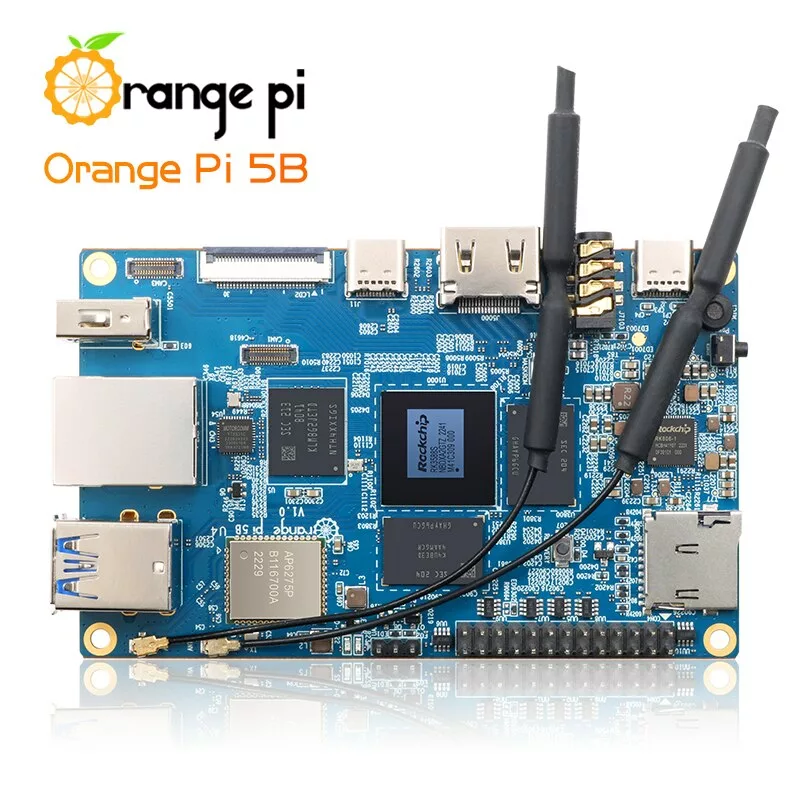
Orange Pi 5B 8GB RAM – High-Performance Single-Board Computer